Loopy!
Have you ever watched an animated movie where the background moves and repeats itself, but you can’t see an obvious place where the repetition starts? That’s because the animators used a seamless background to hide the edge. You can make them in Photoshop!
Before you start: There is a tool in Photoshop to make seamless tiles, but it doesn’t always do a good job. We’re going to use a different method.
We’re going to start with an image of a background. You don’t have to start with a photograph. In fact, it’s actually easier to make a seamless background if you draw it yourself!
We’re also going to make a large image that we can use as a background in movies, but you can use the exact same method to create a background for an animated GIF.
Method 1: the harder but better looking way
- Find a large image for your background. Try to find something where the left and right edges look somewhat similar. I chose this wallpaper of a forest and lake.
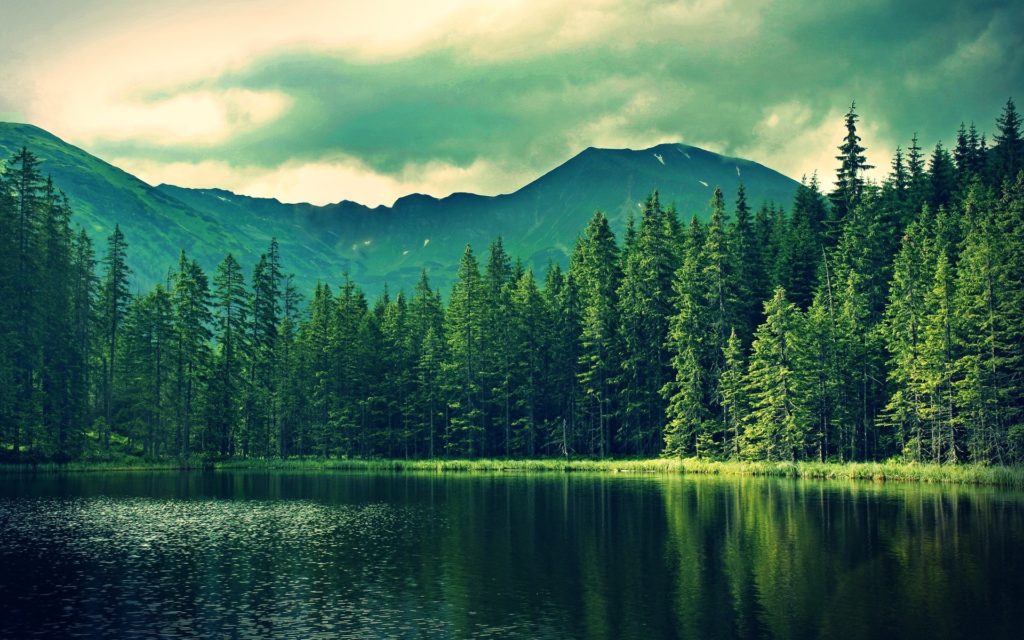
- The original size of this image is 1920 pixels by 1200 pixels. That’s good. HDTV is 1920×1080, so this is a little taller than we need. That’s not a problem. When we use it in a movie, we’ll just lose a few pixels on the top and/or the bottom.
- Open the image in Photoshop.
- From the top menu, choose Filter -> Other -> Offset
- Offset the horizontal by enough pixels so that the seam is visible in the middle. You don’t need to be exact.
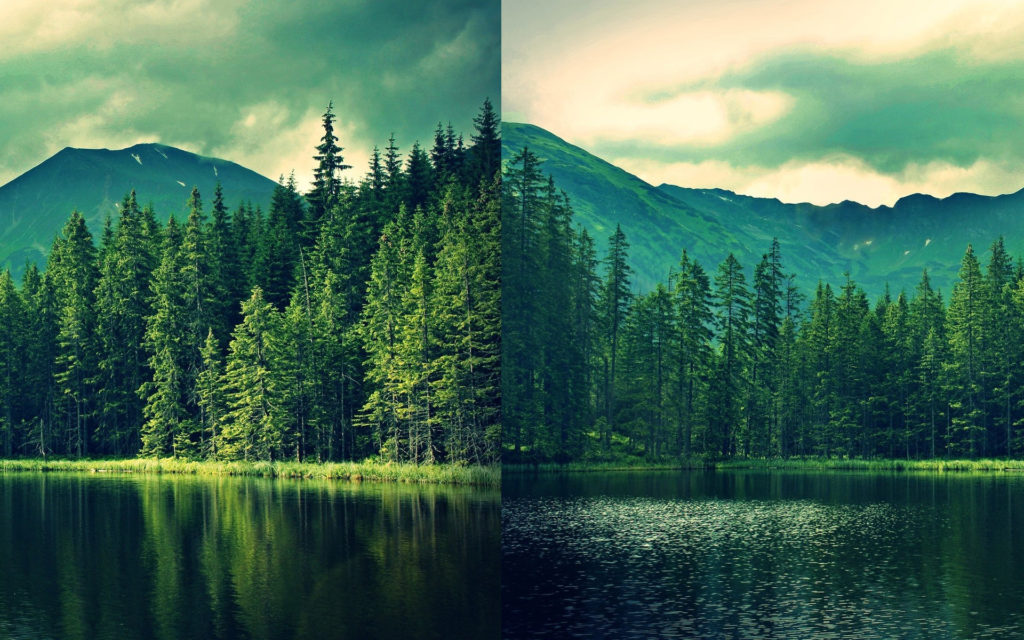
You can see there’s a lot of work to do- nothing matches! Let’s see how well we can get the edge to blend. - Create a new layer. Give it a name that tells you what it does (like “edge patch” or “seam cover.”)
- Select the clone tool from the toolbar. It looks like a rubber stamp.
- At the top of the screen, set “Sample:” to either “all layers” or “current and below. Either will work.
- On your layer you just made, sample areas from one side that will let you cover up the seam. This will take a while. Use a big, soft brush, and don’t be afraid to undo and redo parts as necessary. Remember: it can look totally different from the original image as long as it blends!
Here’s what my patch layer looks like by itself: And here’s the finished patch:
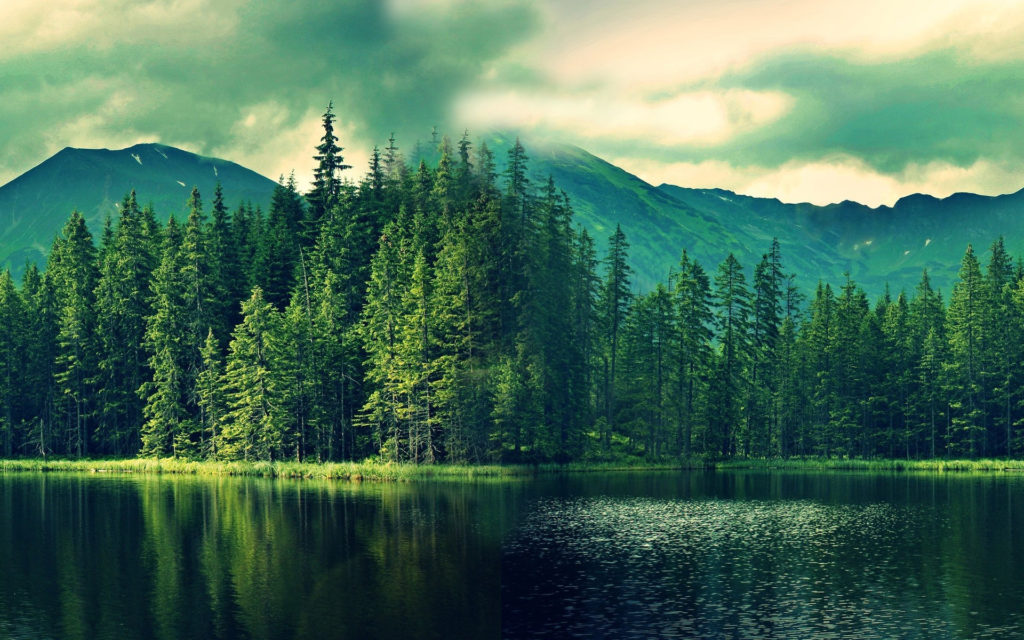
Not bad! Most people wouldn’t be able to tell you where the patch is.


Method 2: the easier but worse looking way
- Find a large image for the background. I’m going to use the same one I used above.
- Open it in Photoshop
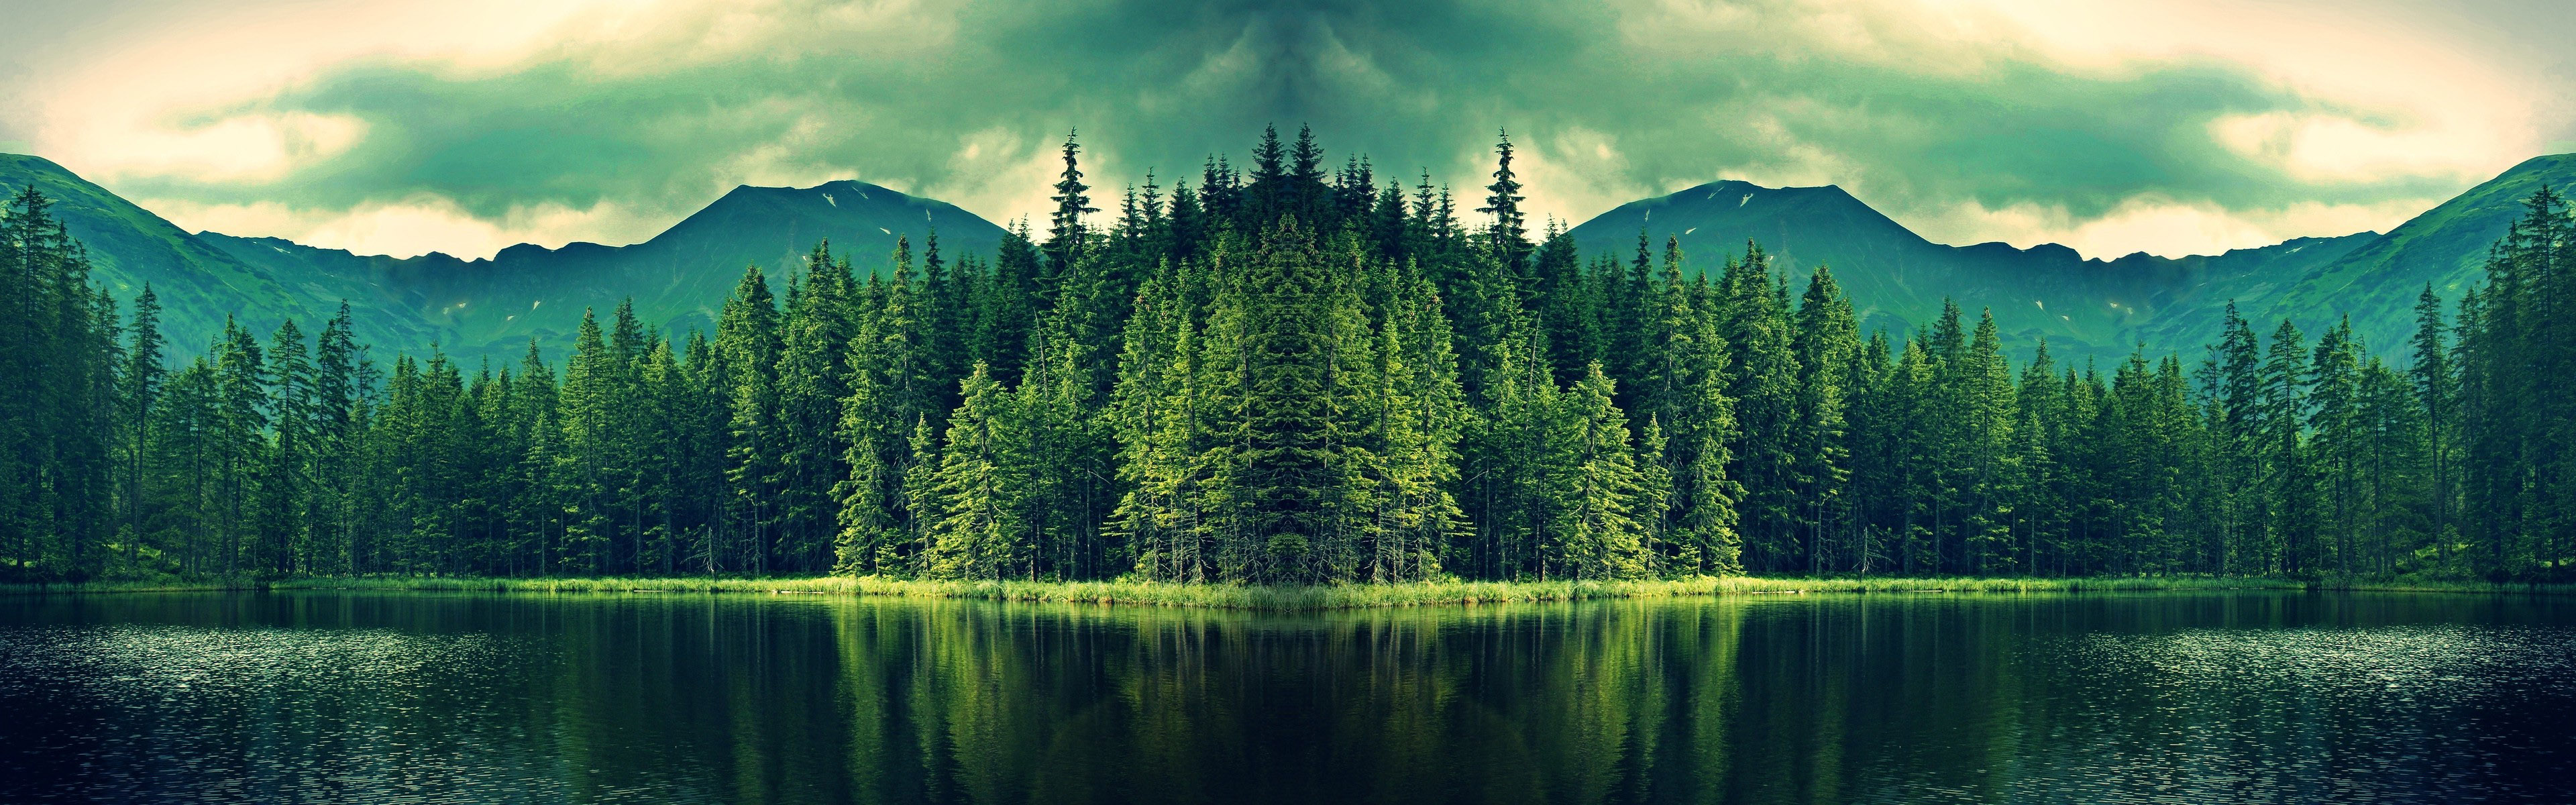
- Make a new document that’s exactly the same height and exactly twice as wide as your background image. My original image is 1920×1200, so my new image will be 3840×1200.
- Select the move tool from the toolbar. It’s the first tool.
- Move a copy of the original image’s background layer onto the new image.
- Position the copy on the left side of the big image.
- Make a copy of the image layer. The easiest way is to press command-J (on a PC, Ctrl-J).
- On the top menu, select Edit -> Transform -> flip horizontal.
- Move the flipped image to the right side of the big image. You’ll have a really wide mirrored background. It’s pretty easy to see where the seams are, but this method could easily work for a moving background, especially if you use it as one of many moving layers, or if the background is very simple.