
GOAL
Use Photoshop to make an image look like a drawing.
There are many, many, MANY ways to alter an image to look like a drawing. I’m going to show a few different tutorials on the same image. You can choose one of them, find a different tutorial, or change any tutorial to make your image look the way you want it to look. Feel free to mix them together!
I’m going to use three different methods on the same image so you can see the similarities and differences. Two methods are tutorials found on Youtube. They were created on Windows machines, so remember to use the command when they say control key. Also, if you haven’t turned on right click on your mouse, you will need to hold down control when you click if the instructions say “right-click.”
The first version gets Photoshop to do most of the work. The second requires you to use the pen tool. The third is the most complex; it requires that you make custom patterns and use fill layers. Whichever method you choose, make sure you start with a large, clear image.
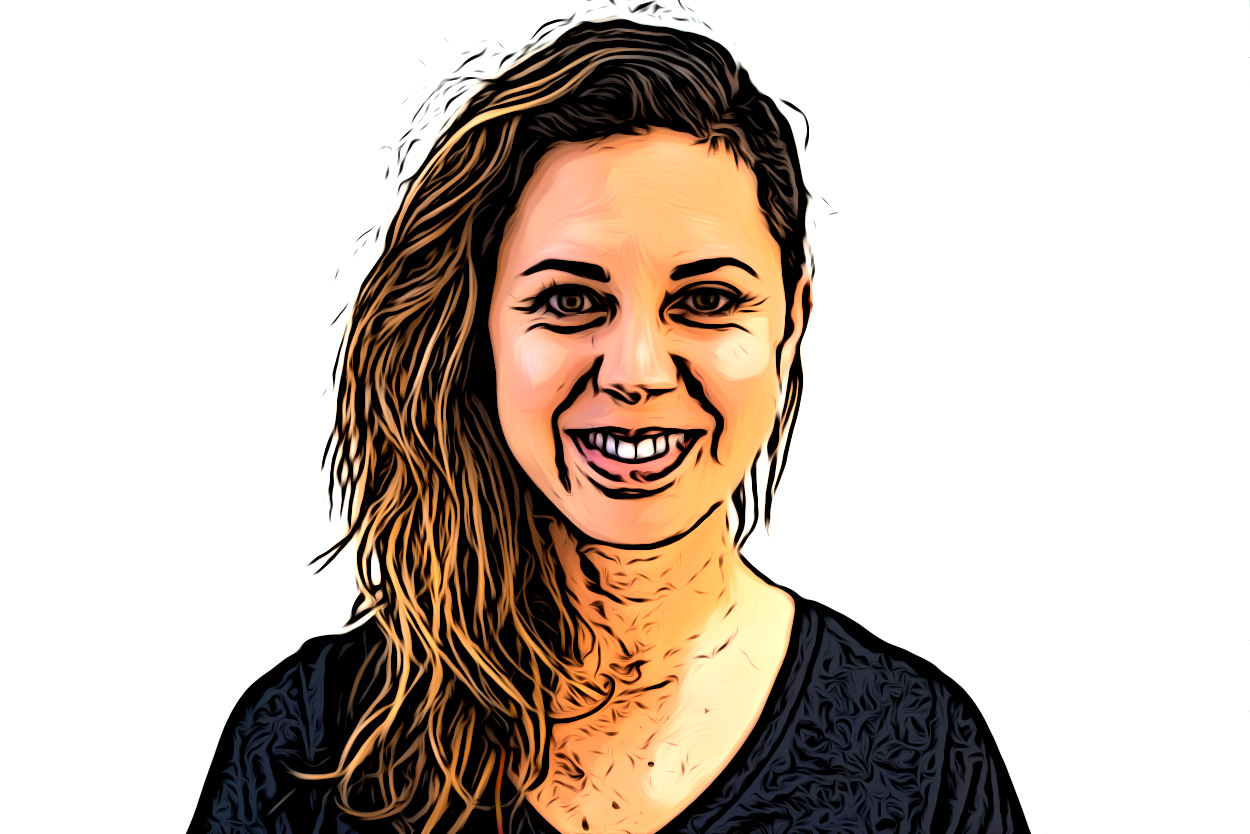
My original:

Four possible ways to do it:


Method 1
Method 2
Method 3
Before we start: making seamless patterns
Before we start, we need to make two seamless patterns. These are going to help make it look like the image was drawn with a pen.
- Open Photoshop.
- On the main menu, select File, then New.
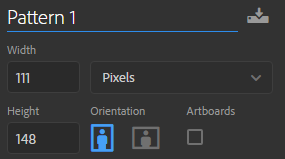
- Set the Width to 111 pixels (NOT INCHES!), and the height to 148 pixels.
- Press command-0 (Windows machine: ctrl-0) to make the image as large as it will fit on the screen.
- Select View -> Show -> Grid to turn on the grid.

Your image will now have an overlay of a grid. It will not show up in the final image. It’s just a guide to help you line things up.

- Press and hold the brush tool on the menu bar, then switch to the pencil tool.

- At the top of the screen, set the pencil to 5 pixels, 100% hardness.

- Use the grid to help you draw a series of slightly slanted lines. Each pencil line should start on one gridline, and finish on the last line over. when it goes off the edge, try to make the line match up with the line on the other side. Din’t worry about being perfect.

- On the main menu, select Filter -> Menu -> Offset:

- Use these settings:

- Your image will shift, and you will be able to see where the pencil lines don’t match up correctly:
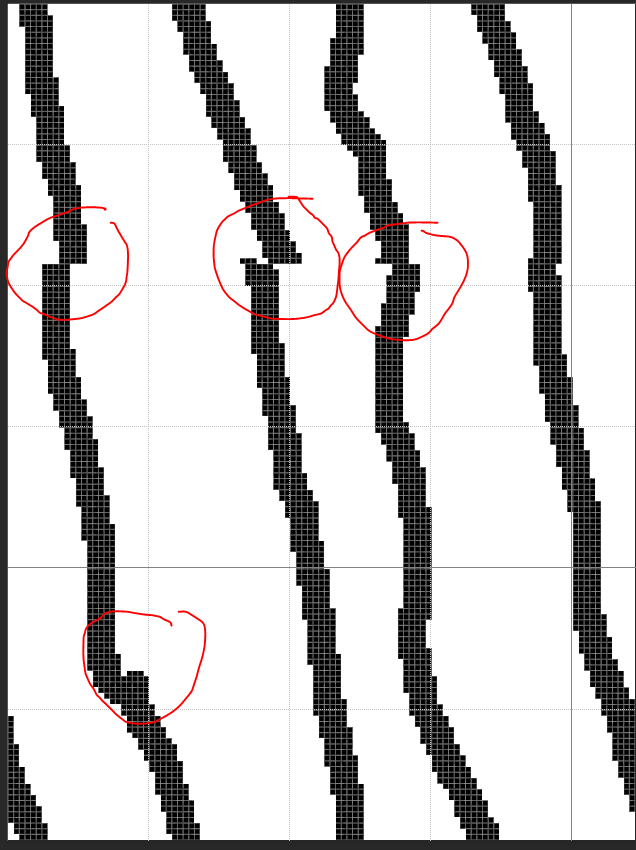
- Use the pencil tool to fix the errors. Draw in missing parts with black, and draw over extra parts with white. It doesn’t need to be perfect. It just has to make the overlap less obvious:

Now this image is ready to be made into a tile! - On the menu, select Edit -> Define Pattern:

- Call the pattern Lines 1, and select OK.

- Close the image. You do not need to save it.
- To make the second pattern, follow the steps above, but make the width 159 pixels, and the height 109 pixels. Draw the lines across instead of down.
We’re ready to do this!
Editing the picture
- Open your image in Photoshop.
- Select the background layer.
- Press command-J (Windows: ctrl-J) to duplicate the layer.

- Double-click the name of layer 1. Change the name to outlines:

- Make sure your foreground color is black, and your background color is white:

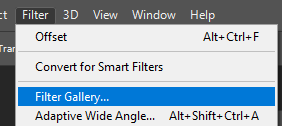
- On the menu, select Filter -> Filter Gallery.
- In the Filter Gallery, go to the Sketch section and select photocopy. Adjust the settings so there’s a good solid line around your image. Here are the settings used for the sample picture. Yours may be different!


Now we need to get rid of the extra spots all over her face. - On the filter menu, choose Filter -> Blur -> Gaussian Blur:

- Blur the image by 2 pixels:

- From the menu, select Image -> Adjustments -> Levels:

- On the levels menu, slide the three sliders close together at a point where you still have your lines, but most of the noise (unwanted lines) disappear. Here’s where mine worked best:
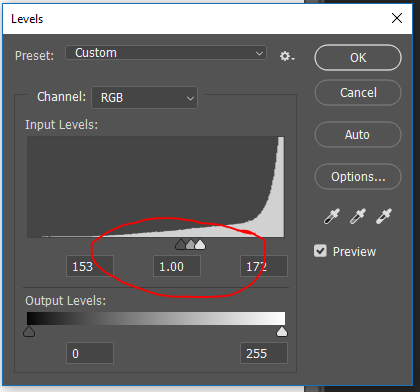
And here’s what my image looked like:
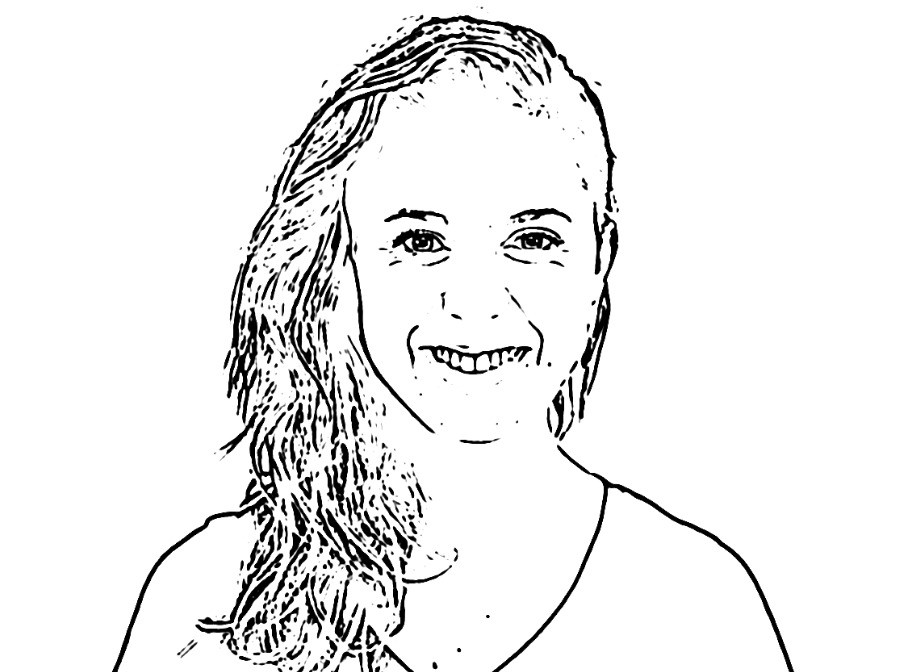
- If there’s still a lot of noise on the image, you can paint over it with white. I only had a couple of dots this time, but sometimes they cover the whole image.

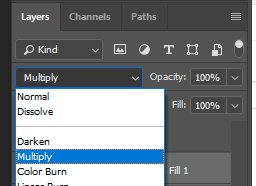
- On the layer menu, change the outline layer from “Normal” to “Multiply”:

You’ll be able to see the outline layer and background combined:

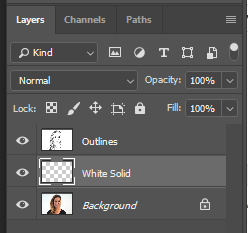
- On the layer menu, select the background layer, then select the new layer icon:

- A new layer will appear between the background and the outline. Name this layer “White Solid.”

- On the main menu, select Edit -> Fill:

- Set the fill color to white and select OK:

- On the layer menu, set the opacity of the white fill layer to 50%:
You can now see the background image, but it’s lighter:
- Make a new layer above the white solid. Name it Black Solid:

- Fill the layer with black. Your image will now be completely black.
- On the layer palette, double click the Black Solid layer in the blank space next to the name of the layer. The layer styles menu will open:
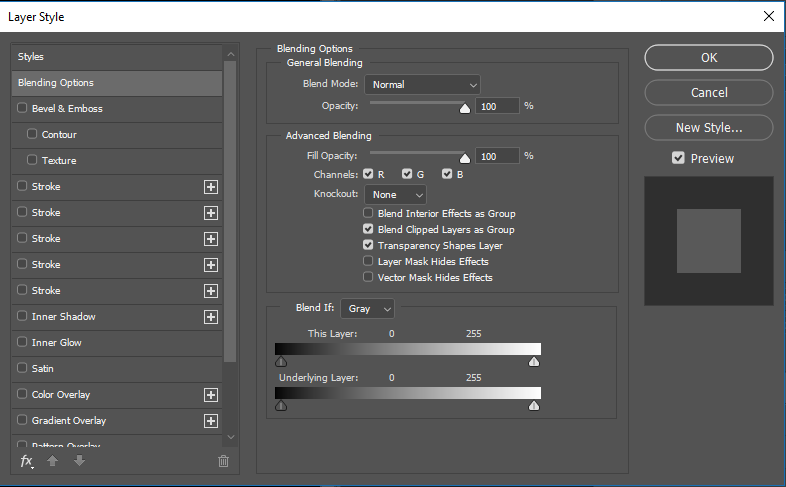
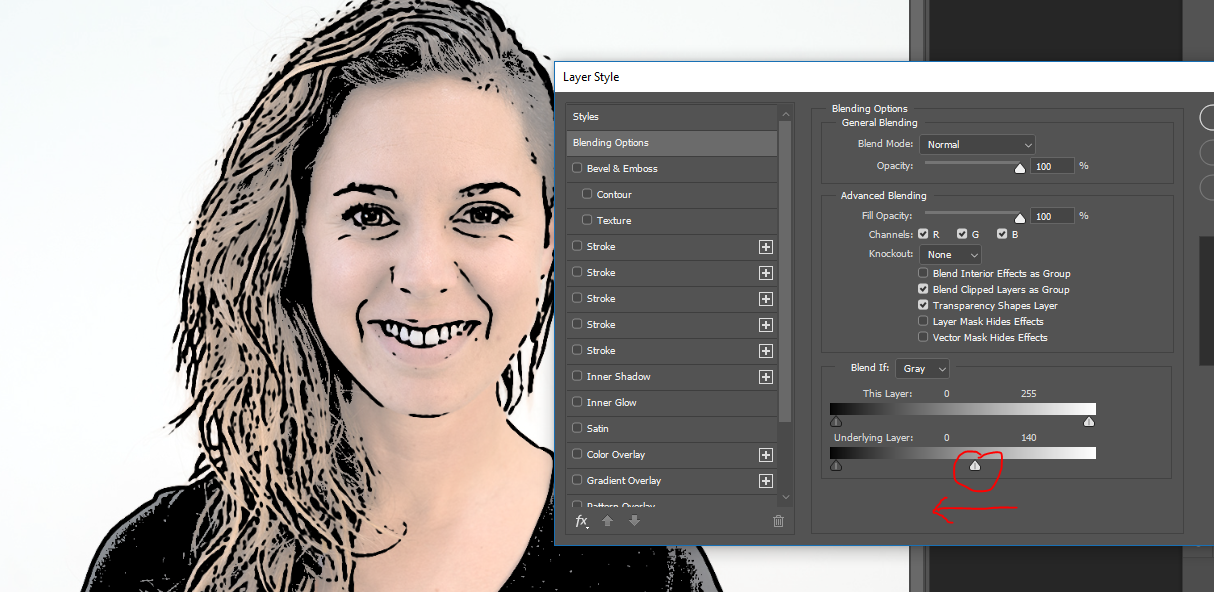
- In the “Blend IF” section, find the white slider below “Underlying Layer” and move it to the left until only the parts of the image that should be black are black:

- Select OK to close the Layer Style menu.
- At the bottom of the layer menu, select the “add a new fill/adjustment layer” icon (a half-black and half-white circle), and select Pattern:

- A new layer called “Pattern Fill 1” will appear, and it will show one of the patterns we made at the start. The pattern will probably be way too large:

- Change the scale to make the lines closer to the size they would be if you had drawn them with a pencil, and select OK:

- Change the mode of the fill pattern layer to multiply:
- Just like you did with the black layer, slide the white Underlying Layer slider to the left until the shadows are only where they should be. Select OK when you’re done.

- Create another Fill Pattern layer. This time, switch to the other pattern you created:

You might have noticed that I have more patterns than you. Once you create a pattern, Photoshop keeps it. You can use it whenever you like! - Follow the same steps as you did for the first layer to place the lines on the new layer.

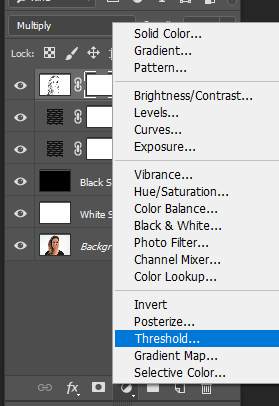
- On the layer palette, select the outline layer.
- At the bottom of the layer palette, select the create a new fill /adjustment layer icon, and choose “threshold”:
- A Properties window will appear above the layer palette. Move the slider to a point where the image looks right to you:

- Your image should look something like this:


Coloring your Image
There are many ways to color your image. Here are two possible methods
1. Copying the original image
If you want the colors close to the original, you could:
- Click on the background layer.
- Press command-J (Windows: ctrl-J)
- Drag the layer to the top of the layer palette.
- On the main menu, choose Filter -> Blur -> Box Blur.
- Set the blur around 8 pixels and press OK.
- On the main menu, choose Filter -> Filter Gallery.
- Select Poster Edges.
- Set Edge thickness and intensity to 0, and Posterization to 2, then Select OK.
- On the layer menu, change the blend mode to multiply.
Result:

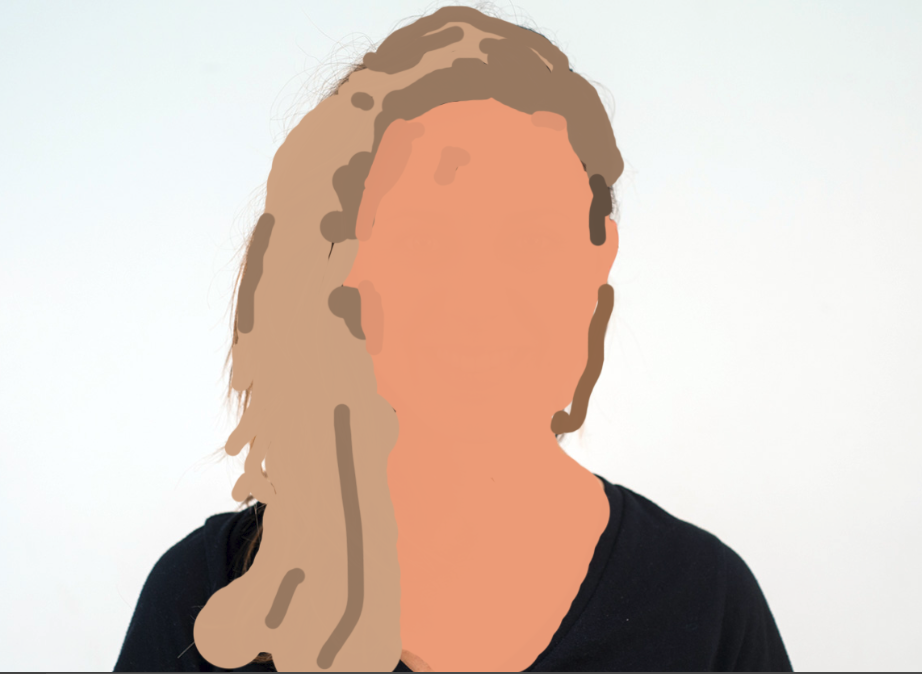
2. Painting your own colors
- Hide all layers except the background (the eye next to each layer shows and hides it).
- Make a new layer above the background and name it “colors.”
- Using the brush color on the new layer to roughly match the original image:
- Move the color layer to the top of the layer stack
- turn the other layers back on.
- set the color layer mode to multiply.
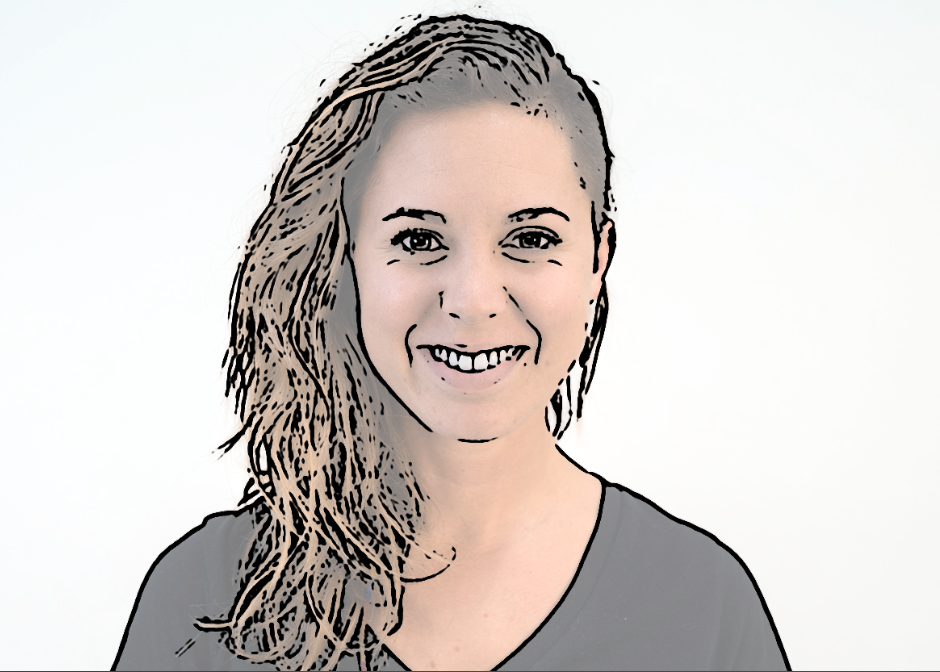
- Add/change colors as needed.
Result:
